
If you love your Facebook photos so much that you want to see them printed over some lovely personalised gifts – then have we got the perfect solution for you.
You know how it is. You’re with your best friends; you snap it and post it on Facebook. You’re hanging out with your adorable little nephew; you take a photo and post it on Facebook. You’re at a family birthday dinner; you click and share it on Facebook. We’re all a bit trigger happy when it comes to sharing our best photos on Facebook and, let’s be honest, Facebook albums are fast taking over any other kind of photo album.
I Want To Enjoy My Facebook Photos In Real Life
It’s great having those photos at the swipe of a finger, but sometimes, it would be really nice to be able to actually display them in your home, or present them as a gift to someone special, who you know will also love them. There are many ways to create photo gifts from Facebook images, but at Bags of Love, we give you the quickest and easiest way, with hardly any steps.
You can have fun making instant photo gifts with your Facebook photos using our nifty design platform – which has just had a lil’ makeover. Our specialist interface makes it super easy to log in to your Facebook profile, making your Facebook photo albums instantly accessible. Sound good? Follow these easy steps to start creating:
1. Head on over to bagsoflove.co.uk

First thing’s first, choose your product! We have hundreds of handmade, personalised goodies so you are guaranteed to find something for everyone. Once you have chosen the perfect gift for you, click on the green “Start Design” button to get started on the design process.
2. Design it
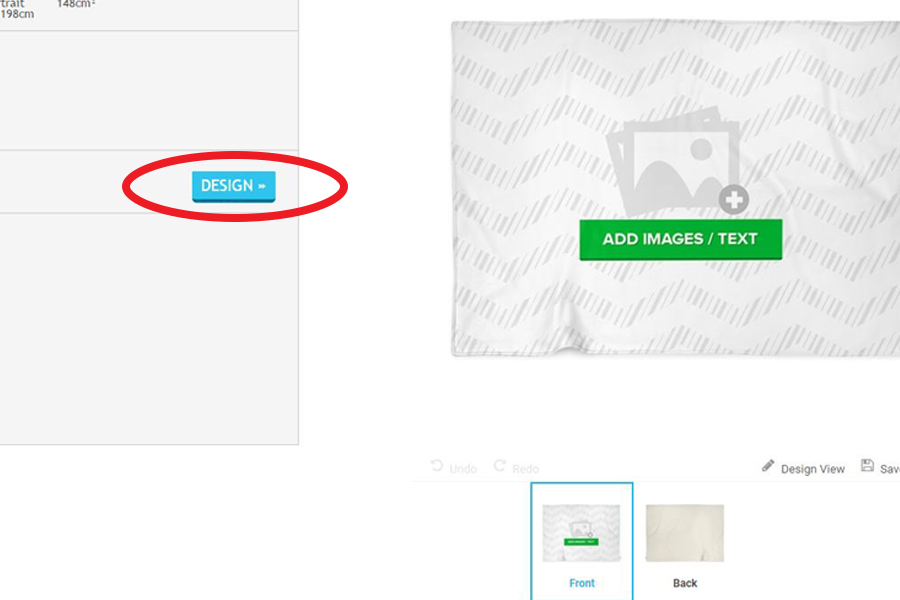
Now that you are in the the design interface, you can select the finer details of your product – some can include; colour, finish, fabric and label. Here is where you also start creating your design from your photos. To get started, click the blue “DESIGN” button.
3. Log in
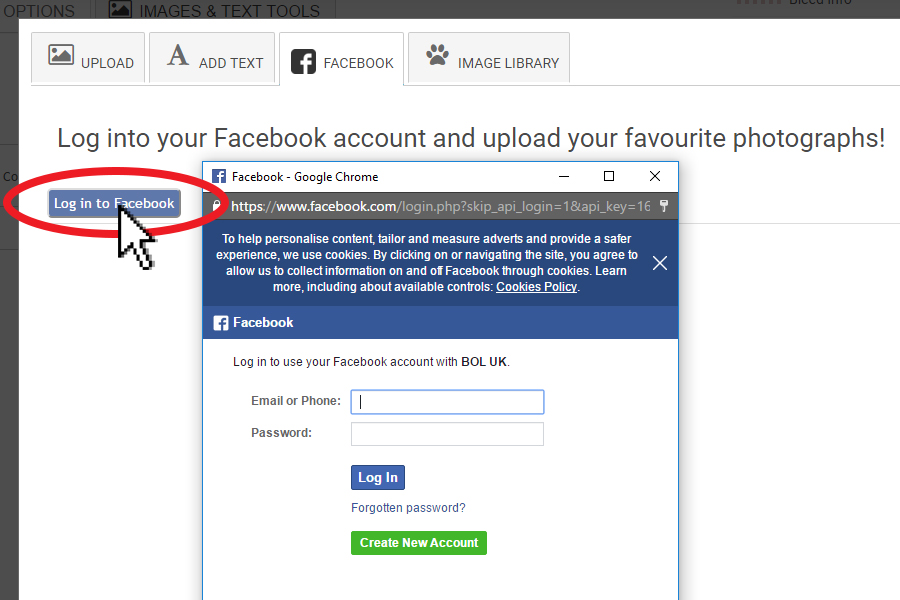
To start uploading your favourite Facebook photos, click on the “Facebook” tab, which is located in the top bar of the design page. Follow the on-screen instructions to log-in to your Facebook account. Don’t worry, we won’t be able to access your profile, only your photos. Once logged in, you will be able to see all of your Facebook albums, complete with the name of the album and the number of photos in each one.
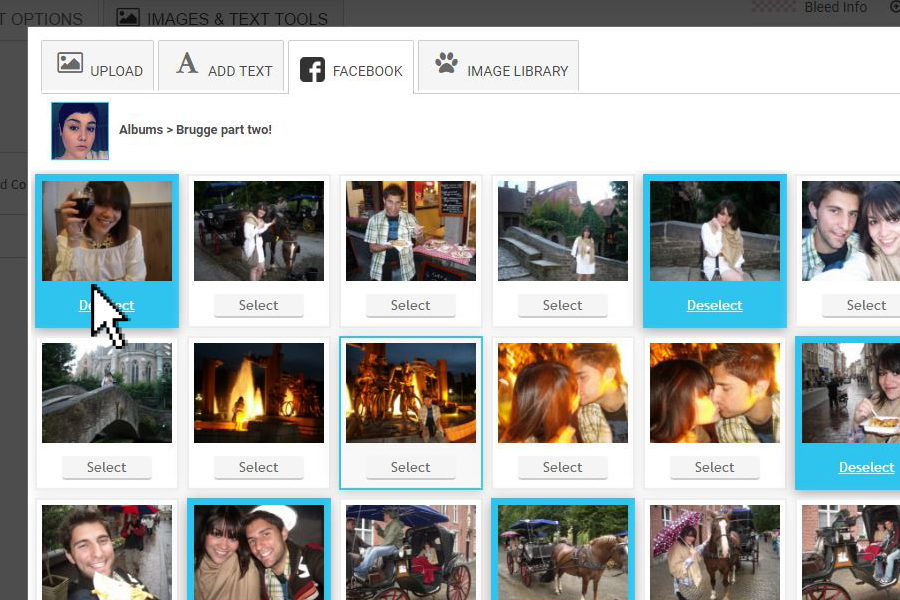
4. Start choosing your photos
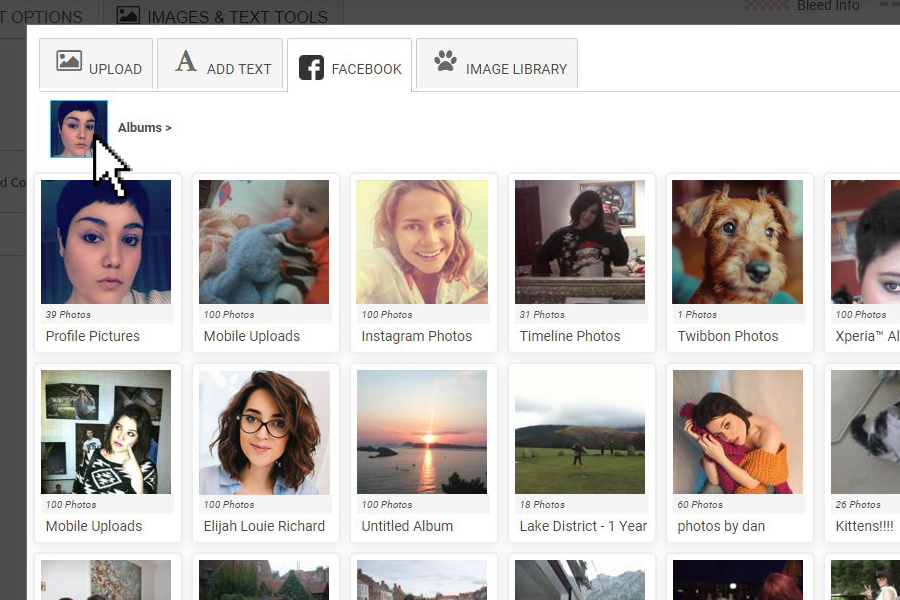
You can now browse through all of your albums and start choosing your photos! Click through to any of your Facebook photo albums and click “Select” on any photo you want. This will automatically store these photos into your design gallery.
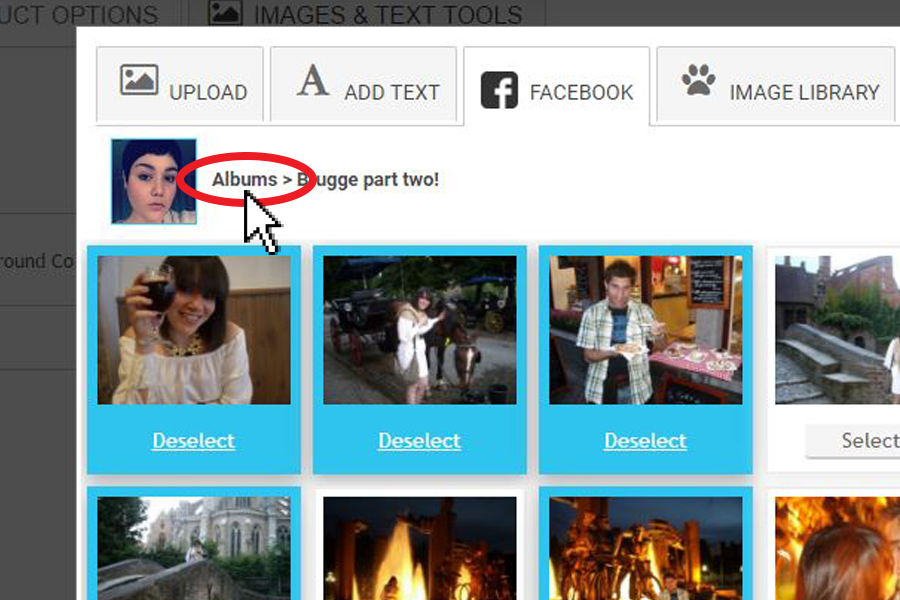
5. Mix & Match
So, you have chosen all of the photos you want in one particular album, but you really want to add some more from a few different albums. No problem! Just click on “Albums” near the top left of the screen and you will be taken straight back to all of your albums and you can continue clicking through and selecting more photos. Our design system will show you how many photos you have chosen from each album and you won’t lose previously selected photos if you go back into another album.
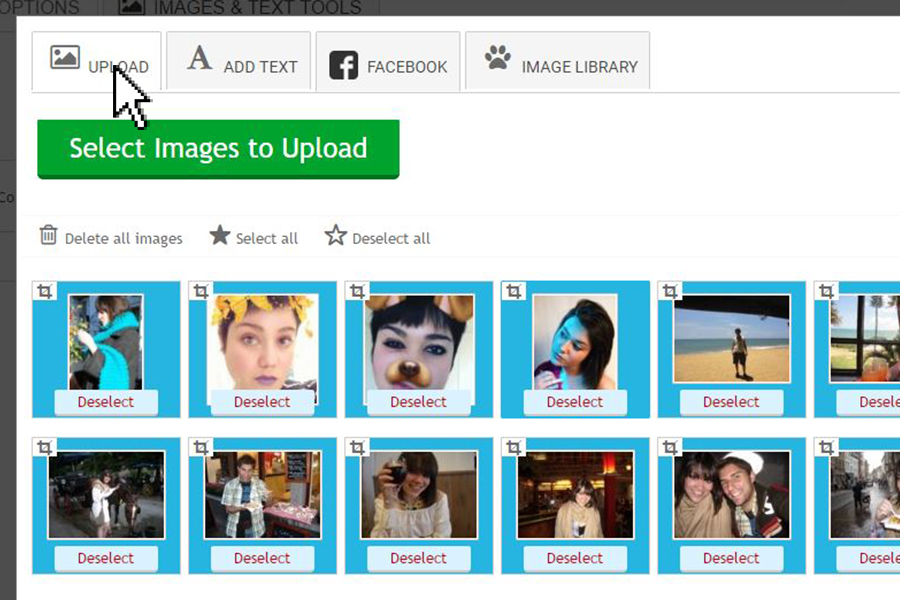
6. We’re quicker than our competitors
Continue mixing and matching photos and albums until you have as many as you want. You don’t need to upload anything with the Bags of Love design platform as it takes care of the uploading process for you; it really is very clever. All the photos you select from your Facebook albums are automatically stored in your design gallery and these can be added to or removed as you wish.
7. Design time

Once you have finished selecting your photos, click back onto the “Albums” page and click the blue “Create montage with (however many number of photos you have chosen) images”
8. Decisions, decisions…
Now it’s time to add your images and the finishing details to your product. Here, you can choose the design and layout of your photos. We have 5 photo montage designs ready to choose from, including; plain with no background, photo frame, scatter, plain heart with no background and framed heart. You can also choose the “do it yourself” option and create your own montage design by following the on-screen instructions.
9. You can still make changes
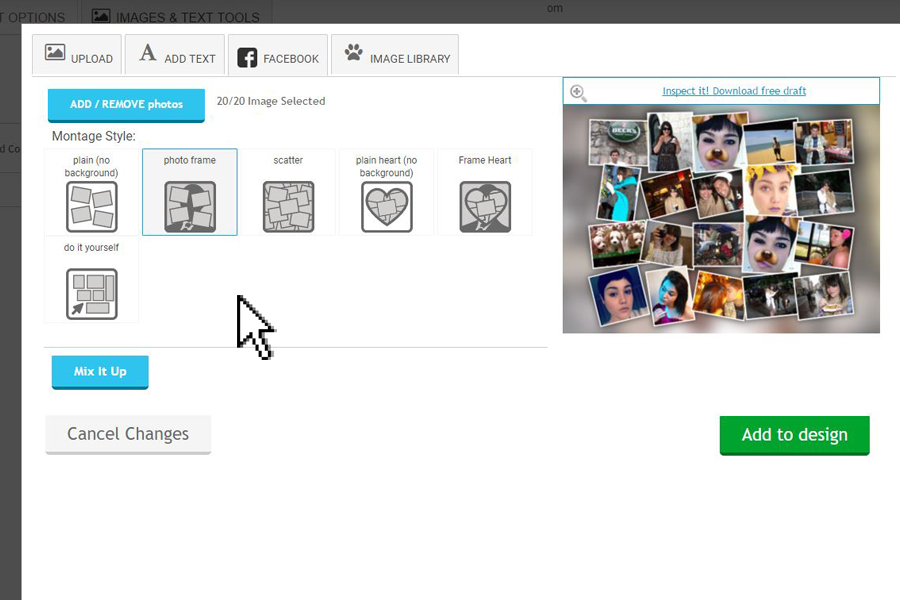
Even when you are at this stage, you can still add or remove photos, if you want to. Click on the blue “ADD/REMOVE photos” button and you will be automatically taken back to your photo gallery, with all of the photos you have chosen for the design. Once here, you can either remove images you no longer want or you can add more photos by following the same steps above.
10. Almost there
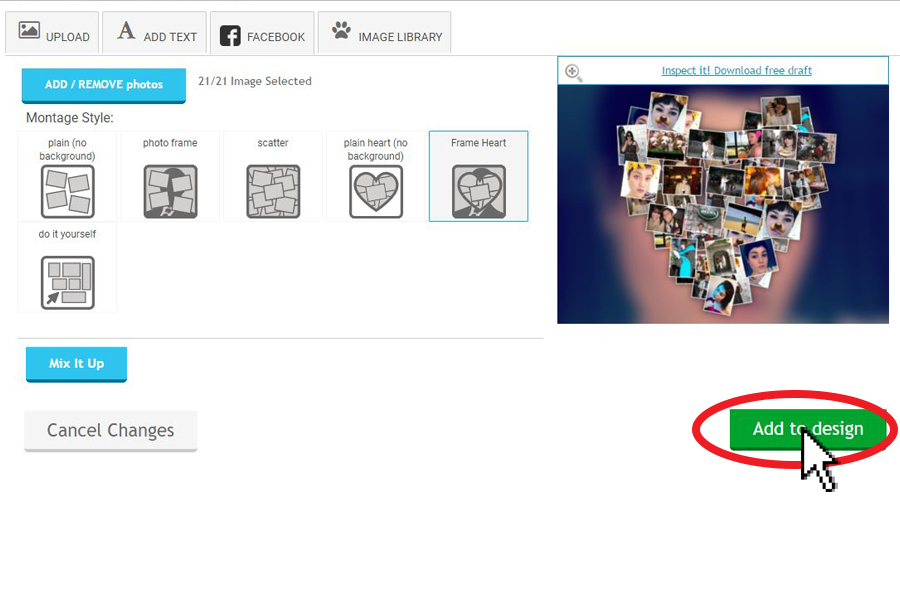
OK, we’re almost there! Once you are totally happy with your photos, the design and the layout you can click blue “Add to Design” button. Now you can preview the final design and how it will look.
11. And finally…
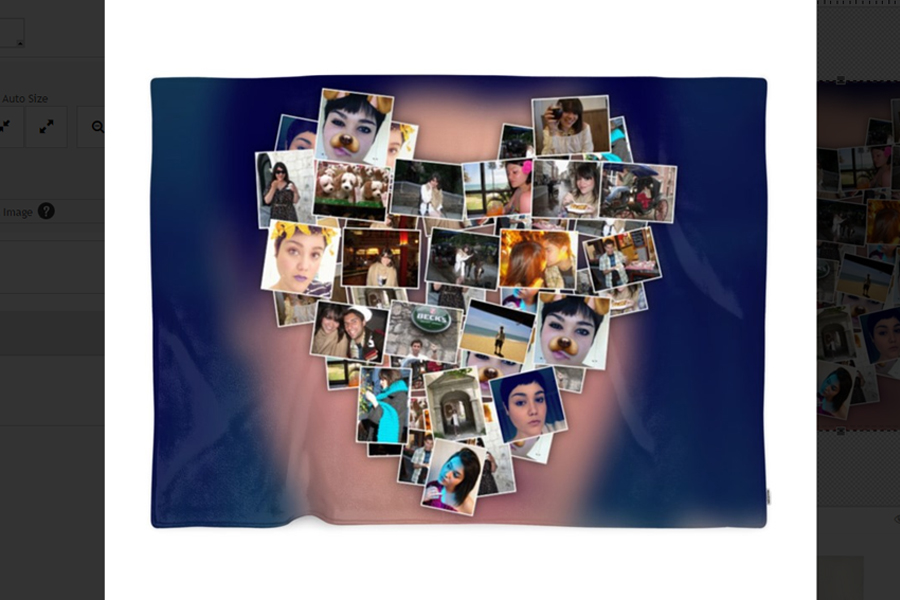
Once you have previewed your final product, there is just one last step; approve it and buy it! Then, wait on tenterhooks for it to arrive, but, don’t worry, the majority of Bags of Love personalised photo gifts are usually printed and handmade within 48 hours, so you will be enjoying your new Facebook photo gift in no time at all.
So, there you have it. Your favourite Facebook photos from screen to the real thing in 11 easy and fun steps!