So Brangelina have finally gotten hitched! About time you two!
Although Angelina looked stunning (come on, when doesn’t she?) we have to admit that we weren’t that blown away by her wedding dress. Her amazing personalised wedding veil, however, truly took our breath away. We here at Bags of Love are huge fans of anything handmade. We love it when care and attention to detail are put into making an item unique and one of a kind, and Angelina’s veil truly lives up to that.
In case you haven’t happened to see Miss Jolie’s, sorry, Mrs Pitt’s incredible veil, let me describe it to you. Master tailor Luigi Massi was appointed to carefully embroider illustrations, drawn by Angelina and Brad’s kids, onto the delicate personalised wedding veil and dress. The children drew a collection of drawings and messages to their mother, which he then embroidered onto her veil, so she could wear them on her wedding day.
What a lovely idea this is! It’s like the tradition to sew your mother’s or grandmother’s wedding lace onto your veil, but given a contemporary twist! Dressmakers have estimated that it could cost up to $3,600 if not more to have a personalised wedding veil made up with embroidered detailing. Quite a lot, when you take into account you still need to buy the dress! But fear not! Bags of Love are here.
We have compiled a tutorial to show you how to get the look of Angelina’s embroidered personalised wedding veil without the hefty price tag, and to have some fun while doing it! Just follow these simple instructions and we’ll show you how to make your very own DIY wedding veil.
Step One: 
First thing is first – you need some adorable drawings created by your little ones! Have some fun with the kids and pass out the paper and crayons and let them doodle whatever they fancy, but remember, scenes of family life and drawings of you and your partner will work particularly well. Once the drawings have been finished, you will need to scan them into your computer and save them as JPEG, TIFF or PNG files.
Step Two: 
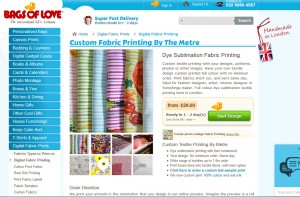
Once you have a selection of drawings scanned in, the next thing you need to do is head on over to the Bags of Love website, which you can do by clicking here. Select the Digital Fabric Prints option on the left hand side and select on the Paris Chiffon option.
Step Three: 
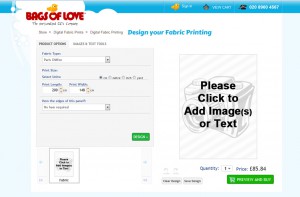
Once you have chosen the fabric for your DIY Wedding Veil, you will be taken to our design page. This is where you will be able to choose the size, design and layout of your design for your personalised wedding veil. You can also select whether you want to have your veil hemmed (something, which we definitely recommend).
Step Four: 
Click on the green “Design” button. This will take you to a page, where you can upload you kiddie’s drawings. Click on the green “Select Images to Upload” option and select the drawings you wish to upload onto your veil. One you have uploaded all of them, click on the “Select all” option, if you want all of them, or click on the individual images, if you only want to select a few.
Step Five: 
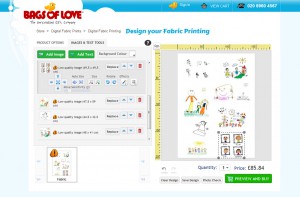
Now you can have some fun with your design! You will see your drawings displayed on the design canvas. To reposition and change the size of the individual drawings, simply click on the drawing and drag it to where you wish. You can then alter the size, rotate it, add an effect, change the colour etc. Have fun making the design exactly as you want it.
Step Six:
You have finished your amazing customised veil design! Well done you! Now all you need to is preview and buy your design and voilà! It will be printed and made for you right here at Bags of Love HQ in West London and sent out to you.
Now that you know how to make your own wedding veil, all that is left for us to say is we hope you have a wonderful wedding day and make sure you send us some photos. We’d love to see snaps of you wearing your gorgeous personalised wedding veil.


